CREATE A WEBHOOK
You can follow these steps to create a Webhook on Utas:
- Set up your Webhook Link, then log in to app.utas.co
- Click Integration Menu.
- Click the Webhook tab on the Integration page.
- Click the Create New Webhook button.

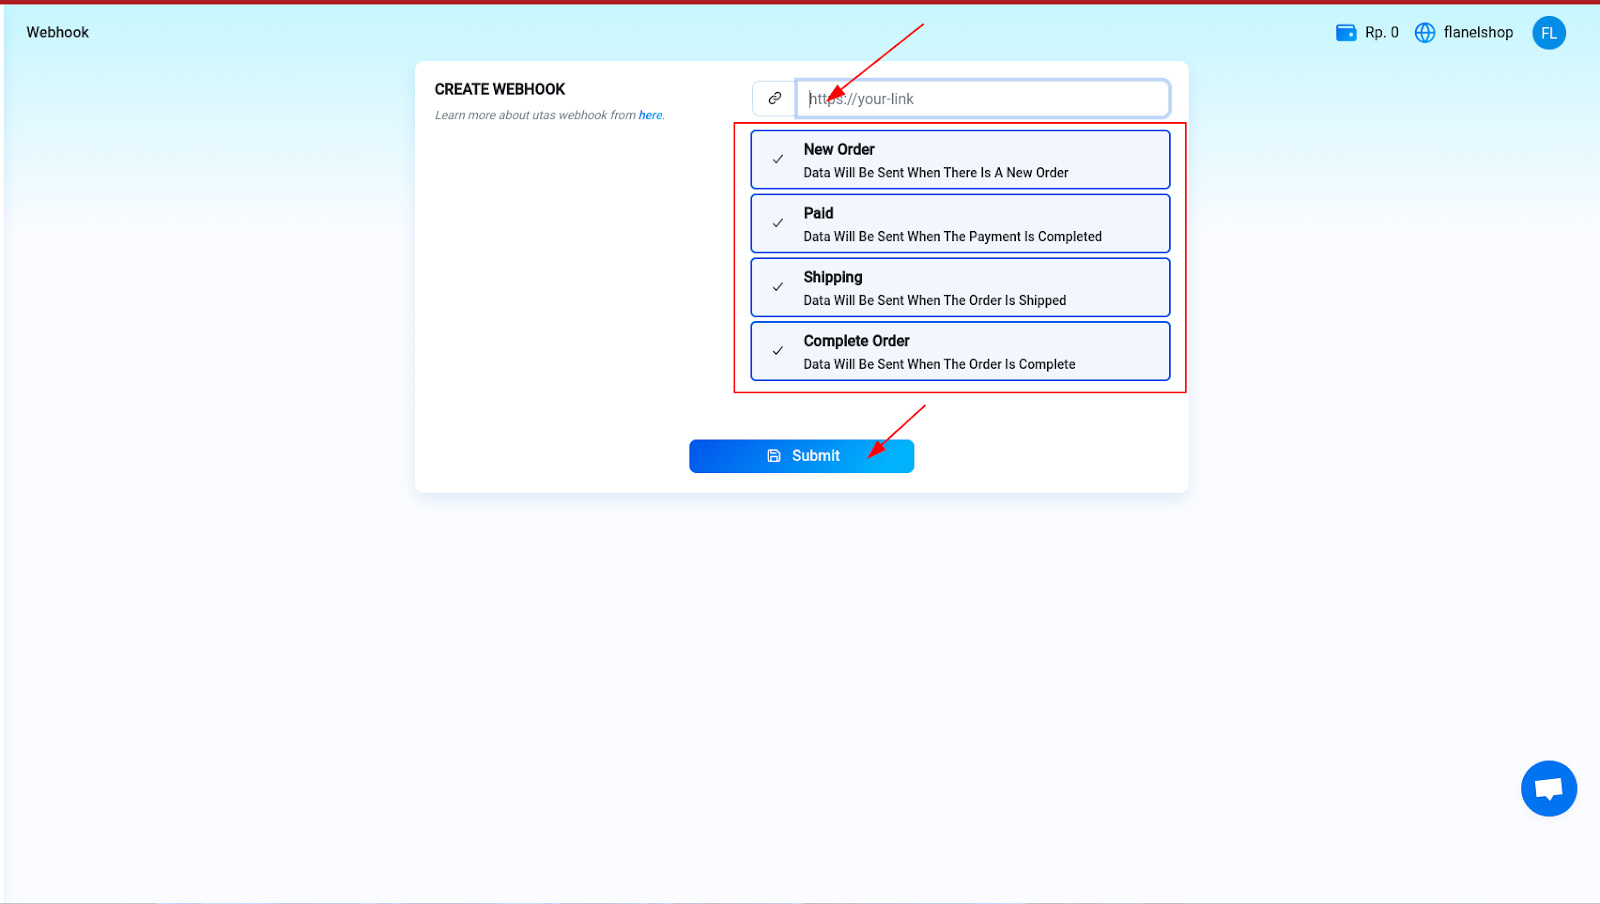
- Type the webhook link/URL that you have.
- Select the Trigger that you need. There are four options that you can choose. You may select more than one trigger:
- New Order
- Paid
- Shipping
- Complete.
- Click Submit button to save your configuration.
- Click OK in the pop-up notification.
- Done.
webhook response Example
Header
content-type | application/json
Return New order
{
  "state": "order",
  "name": "xxx",
  "email": "[email protected]",
  "address": "-",
  "store": "xxxx",
  "items": [
    {
      "item_name": "Xxxxx",
      "item_qty": "xx",
      "item_price": "xxx",
      "item_data": "xx"
    }
  ],
  "total": "xx",
  "store_link": "xxx"
}
Paid
{
  "state": "paid",
  "name": "xxx",
  "email": "[email protected]",
  "address": "-",
  "store": "xxxx",
  "items": [
    {
      "item_name": "Xxxxx",
      "item_qty": "xx",
      "item_price": "xxx",
      "item_data": "xx"
    }
  ],
  "total": "xx",
  "store_link": "xxx"
}
Shipping
{
  "state": "shipping",
  "name": "xxx",
  "email": "[email protected]",
  "address": "-",
  "store": "xxxx",
  "items": [
    {
      "item_name": "Xxxxx",
      "item_qty": "xx",
      "item_price": "xxx",
      "item_data": "xx"
    }
  ],
  "total": "xx",
  "store_link": "xxx"
}
Complete
{
  "state": "complete",
  "name": "xxx",
  "email": "[email protected]",
  "address": "-",
  "store": "xxxx",
  "items": [
    {
      "item_name": "Xxxxx",
      "item_qty": "xx",
      "item_price": "xxx",
      "item_data": "xx"
    }
  ],
  "total": "xx",
  "store_link": "xxx"
}
EDIT THE WEBHOOK
To edit the webhook in Utas, please follow the steps below:
- Log in to app.utas.co.
- Click Integration Menu.
- Click the Webhook tab on the Integration page.
- Select the webhook that you want to edit.
- Click the Edit option at the bottom of it.

- Choose the option that you want to edit.
- Click Submit Button to save your configuration.

- Click OK in the pop-up notification.
- Done.


DELETE THE WEBHOOK
Please follow the steps below:
- Log in to app.utas.co
- Click Integration Menu.
- Click the Webhook tab on the Integration page.
- Select the Webhook that you want to delete.
- Click the Delete option below the URL.

- Click the Yes, delete it! button on the Are you sure? pop-up notification.

- Done.

